
Mastering the Bridal Updo: Tools, Products, and Techniques for Long-Lasting Style
The bride sits in your chair. She's been dreaming of this day for months. The dress is hanging nearby. The photographer is watching. The timeline says she needs to be finished in 45 minutes. And her hair needs to last through tears, wind, dancing, photos, and a veil—for twelve hours.
No pressure.
Bridal styling is one of the most rewarding and most demanding specialties in our industry. The stakes are high. The timeline is tight. And the expectations are enormous. A bride doesn't just want a pretty updo. She wants armor. She wants to feel beautiful, confident, and secure—knowing that her hair will stay exactly where you placed it, from the first look to the last dance.
This guide will walk you through everything you need to master the bridal updo: the tools that make the difference, the products that lock everything in place, and the techniques that ensure your style survives the longest wedding day.
The Bridal Mindset: What Makes Wedding Hair Different
Before we talk about tools and techniques, you need to understand what makes bridal hair different from any other updo.
| Factor | Why It Matters |
|---|---|
| Duration | The style must last 10-14 hours, often through humidity, dancing, and tears. |
| Movement | The bride will walk, hug, dance, and tilt her head for photos. The style must move with her. |
| Weight | Veils, combs, and sometimes heavy hair require secure anchoring. |
| Emotion | Tears, nerves, and excitement can affect the scalp (sweat, tension). |
| Photography | Every angle will be photographed. The style must look beautiful from all sides. |
| No second chances | There is no "let me fix that" after the bride walks down the aisle. |
Bridal styling is not creative experimentation. It is precision engineering with a beautiful finish.
Part 1: The Tools You Need
Essential Tools for Every Bridal Kit
| Tool | Why You Need It | Pro Tip |
|---|---|---|
| Sectioning clips (12-20) | You need to keep sections clean and separate | Use double-prong clips for heavy sections; single-prong for detail work |
| Pin tail comb | Clean partings; teasing; smoothing | Choose one with a metal tail for durability |
| Teasing brush | Creating volume and grip | A fine-tooth teasing brush creates smoother backcombing than a comb |
| Boar bristle brush | Smoothing the surface without destroying volume | Use after teasing to polish the outer layer |
| Curling iron (1-inch barrel) | Creating waves and curls that hold | Test temperature on a mannequin first—too hot damages; too cool doesn't hold |
| Flat iron | Smoothing and creating bends | Use for texture, not just straightening |
| Hairpins (not bobby pins) | Securing heavy sections | Hairpins have waves that grip; bobby pins are flat and slip |
| Bobby pins (matched to hair color) | Finishing and detail work | Matte finish pins grip better than shiny ones |
| Elastics (clear or matched to hair color) | Sectioning and securing bases | Avoid rubber bands (they break and pull hair) |
| Netting or hair spray shield | Protecting the rest of the style while spraying | A simple piece of cardboard or a fan brush works |
| Crimp tool (optional) | Creating texture and grip at the roots | A quick crimp at the roots adds massive volume and staying power |
The Pin Guide: Hairpins vs. Bobby Pins
This is the most misunderstood tool in bridal styling.
| Pin Type | Appearance | Best For |
|---|---|---|
| Hairpin | Wavy, open shape; both prongs are wavy | Securing heavy sections; anchoring rolled or twisted hair |
| Bobby pin | Flat, closed shape; one wavy side, one smooth side | Finishing; pinning small sections; securing loose ends |
The golden rule: Hairpins hold weight. Bobby pins hold detail.
For a heavy French twist or a large bun, use hairpins. For tucking ends or securing a small piece of hair that escaped, use bobby pins. Using the wrong pin is why your updos fall out.
Part 2: The Products That Lock Everything In
Bridal hair needs a different product strategy than editorial or everyday styling. The goal is hold, not flexibility.
The Bridal Product Pyramid
| Layer | Product Type | Purpose |
|---|---|---|
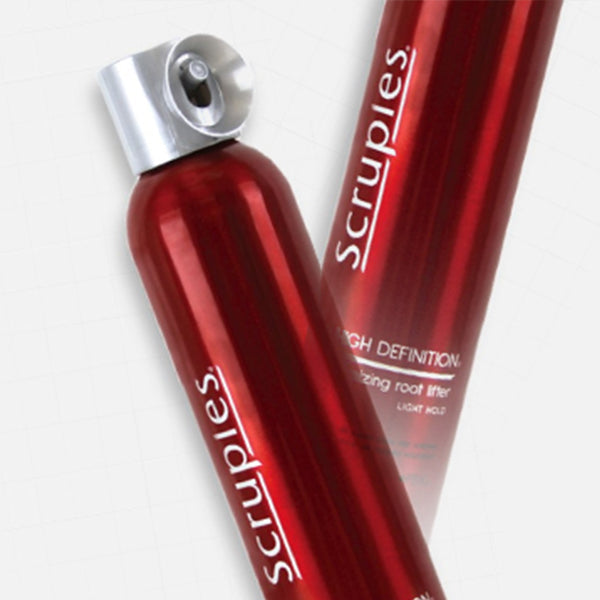
| Base (on damp hair) | Volumizing mousse or root spray | Creates grip and foundation for teasing |
| Mid (on dry hair before styling) | Texture spray or working spray | Adds friction; prevents slipping |
| During styling | Light-hold hairspray (between sections) | Locks each section before moving to the next |
| Finish (after completion) | Firm-hold hairspray | Seals the entire style |
| Weather protection | Humidity-resistant finishing spray | Prevents frizz and collapse in humidity |
The "No-Slip" Preparation
For fine or slippery hair, preparation is everything.
Step 1: Day-old hair is better
Freshly washed hair is too slippery. Ask the bride to wash her hair the day before the wedding, not the morning of. If hair is freshly washed, use a dry shampoo or texture spray at the roots before styling.
Step 2: Build grip at the roots
Apply a volumizing mousse to damp roots. Blow-dry in the opposite direction of the final style. Then apply a texture spray to dry roots before teasing.
Step 3: Tease with intention
Teasing (backcombing) creates the scaffolding for your style. Tease only the sections that need volume or anchoring. Smooth the top layer over the teasing without brushing it out.
The "Crimp Trick" for Fine Hair
For brides with very fine or slippery hair, a crimping tool is your secret weapon.
What to do:
-
Take small sections where you need volume (crown, sides)
-
Crimp the roots only (1-2 inches from the scalp)
-
Do not crimp the ends
-
Smooth the top layer over the crimped section
-
Style as usual
The crimped texture creates friction that holds pins and maintains volume without excessive teasing or product buildup.
Part 3: The Techniques That Last
The Foundation: Creating a Secure Base
Every lasting updo starts with a secure foundation.
For ponytail-based updos:
-
Use two elastics: one at the base, one an inch lower
-
Pull the ponytail slightly to create tension at the scalp
-
Backcomb the ponytail before pinning for grip
For pinned updos (no elastic):
-
Start with clean, textured hair
-
Build the style from the bottom up
-
Anchor each section before moving to the next
-
Never try to pin through teased hair (pins will slide)
The "Pin Within a Pin" Technique
This is the most secure way to anchor a heavy section.
What to do:
-
Insert the first hairpin at a 45-degree angle into the rolled section
-
Catch a small amount of scalp hair with the pin
-
Rotate the pin 90 degrees as you push it in
-
Insert a second pin crossing the first (forming an "X")
-
The two pins lock each other in place
This technique distributes weight across multiple pins and prevents any single pin from pulling out.
The "Layering" Method for Volume and Longevity
Instead of creating one large bun or twist, build the style in layers.
| Layer | What It Does |
|---|---|
| Base layer | Creates the shape and anchors the style |
| Middle layer | Adds volume and dimension |
| Top layer | Smooths and finishes the surface |
| Detail layer | Adds texture, pins, or accessories |
Each layer is pinned independently. If one section shifts, the others remain secure.
The "Bobby Pin Lock" for Small Sections
For detail work or securing loose ends, use the bobby pin lock.
What to do:
-
Insert the bobby pin with the wavy side facing down (toward the scalp)
-
Slide it in at a 45-degree angle
-
Catch a small amount of scalp hair
-
Push it in until it disappears under the top layer
The wavy side creates friction against the scalp. The smooth side allows the top layer to lie flat.
Part 4: The Bridal Timeline
The Morning-Of Schedule
| Time | Task |
|---|---|
| 2 hours before photos | Bride arrives with clean, dry, day-old hair |
| 1 hour 45 minutes before | Apply base products (mousse, texture spray) |
| 1 hour 30 minutes before | Create foundation (teasing, base sections) |
| 1 hour 15 minutes before | Build the updo (layer by layer) |
| 45 minutes before | Finish the style (smooth, spray, add accessories) |
| 30 minutes before | Final check; photos of the finished style |
| 15 minutes before | Bride dresses (don't touch the hair) |
The "Emergency Kit" for the Wedding Day
Give the bride or maid of honor a small emergency kit:
| Item | Why |
|---|---|
| Extra bobby pins (matched to hair color) | For any pins that shift during dancing |
| Small hairspray (travel size) | For touch-ups before photos |
| Comb or pick | For any pieces that escape |
| Veil comb (if applicable) | In case the original breaks |
Part 5: The Veil and Accessories
Securing a Veil
A veil comb must be anchored into the updo, not just placed on top.
What to do:
-
Create a "pocket" in the updo where the veil will sit
-
Insert the veil comb at a 45-degree angle
-
Push it in until it catches on teased hair and pins
-
Add two crossed bobby pins over the comb for security
-
Test by gently pulling the veil—it should not move
Pro tip: If the veil is heavy, create a small elastic loop in the updo and thread the veil comb through it before securing with pins.
Flowers, Combs, and Jewelry
| Accessory | Securing Method |
|---|---|
| Fresh flowers | Wire wrapped around a bobby pin; inserted into teased hair |
| Decorative comb | Slide into teased hair; secure with crossed bobby pins |
| Hair jewelry (pins, chains) | Weave into finished style; no additional securing needed |
| Tiara or crown | Position on teased crown; secure with bobby pins on both sides |
Part 6: The "Weather-Proof" Protocol
For Humidity
| Challenge | Solution |
|---|---|
| Frizz | Humidity-resistant finishing spray; smooth top layer with a boar bristle brush |
| Curls falling | Crimp roots before curling; use firm-hold spray between sections |
| Slippage | Texture spray at the roots; day-old hair |
For Wind (Outdoor Weddings)
| Challenge | Solution |
|---|---|
| Loose pieces | Pin everything. No "romantic wispies" in high wind. |
| Veil lifting | Anchor veil with at least 6 pins (not 2) |
| Flyaways | Use a finishing spray with hold, not just shine |
For Tears and Dancing
| Challenge | Solution |
|---|---|
| Tears | Water-resistant finishing spray; avoid spraying near eyes |
| Dancing movement | Hairpins (not bobby pins) for weight-bearing sections; crossed pins throughout |
| Sweat (scalp) | Matte texture spray (not oil-based); dry shampoo at roots before styling |
Part 7: The Bridal Consultation
Questions to Ask Every Bride
| Question | What It Reveals |
|---|---|
| "What's your dress neckline?" | Determines where the updo should sit (high, low, side) |
| "Do you have a veil? How heavy is it?" | Determines how much anchoring is needed |
| "What's your hair type and texture?" | Fine hair needs more grip; thick hair needs more pins |
| "How long do you need the style to last?" | If it's a 14-hour day, you need more security |
| "What's your backup plan if it rains?" | Outdoor weddings need weather-proofing |
| "Are you doing a first look?" | Affects the timeline |
The "Trial Run" Non-Negotiable
A bridal updo should never be done for the first time on the wedding day.
What to cover in the trial:
-
The style itself
-
How it holds for 4-6 hours (wear it for the rest of the day)
-
How it feels (too tight? too heavy?)
-
How it photographs (take photos from all angles)
-
Accessories (veil, comb, flowers)
What to document:
-
Photos from every angle
-
Products used (exact names)
-
Pin placement (diagram or photos)
-
Any modifications the bride requests
The "Emergency Fix" Guide (For the Wedding Day)
| Problem | Fix |
|---|---|
| A section has fallen | Pin it back with two crossed bobby pins; spray |
| The whole style is collapsing | Remove the lowest pins, re-pin with hairpins, spray heavily |
| Frizz is appearing | Smooth with a boar bristle brush; add finishing spray |
| The veil won't stay | Add two more pins crossing the comb; create a pocket |
| A flower fell out | Rewire onto a fresh bobby pin; insert into teased area |
Bridal updos are not just hairstyles. They are engineering projects. They are emotional anchors. They are the foundation of a bride's confidence on one of the most important days of her life.
Your tools matter. Your products matter. Your techniques matter. But what matters most is your preparation. A bride who trusts you with her wedding hair is trusting you with her memories. Honor that trust by showing up prepared, confident, and ready to create something that lasts—not just through the ceremony, but through the first dance, the bouquet toss, and the sparkler exit.
When she looks at her wedding photos twenty years from now, she won't remember the products you used or the pins you placed. But she will remember how she felt. Beautiful. Confident. Secure.
That is the art of the bridal updo.